Black & White Ombre Nails with Cherry Blossoms for Chic Spring
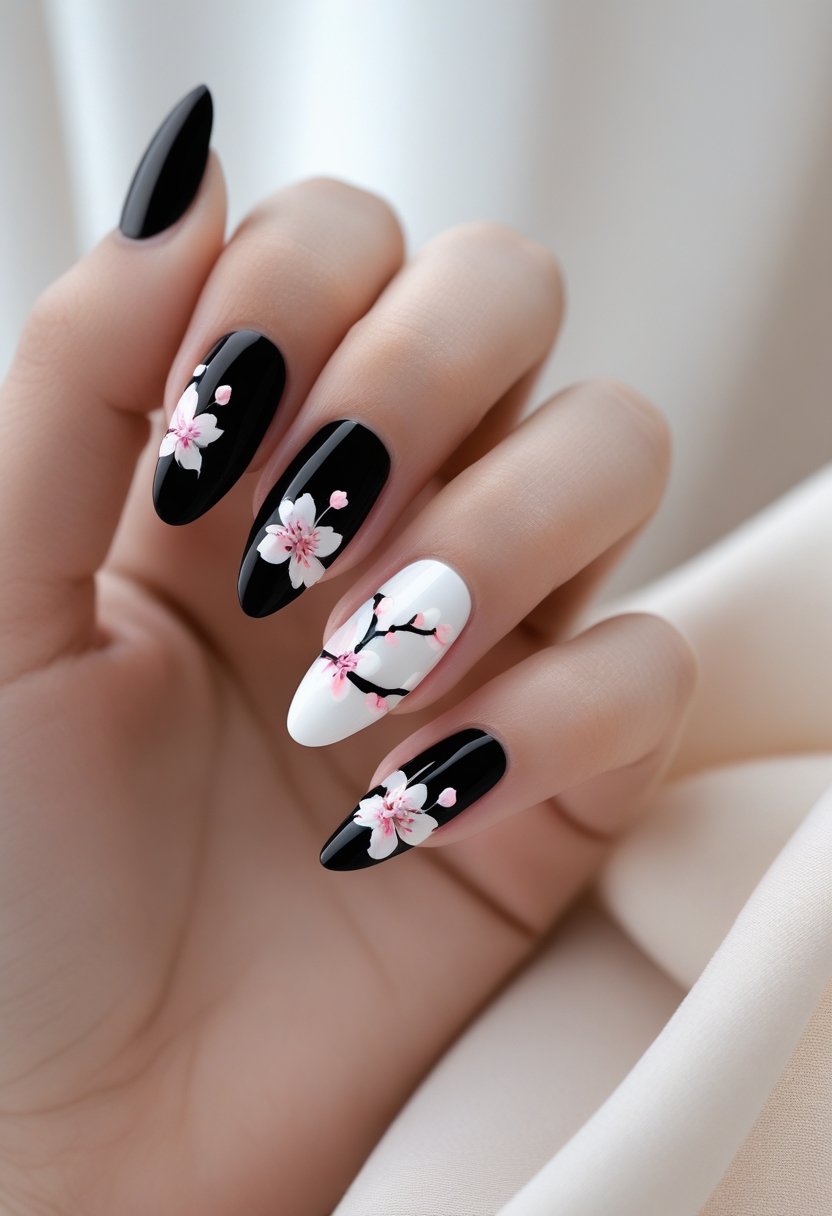
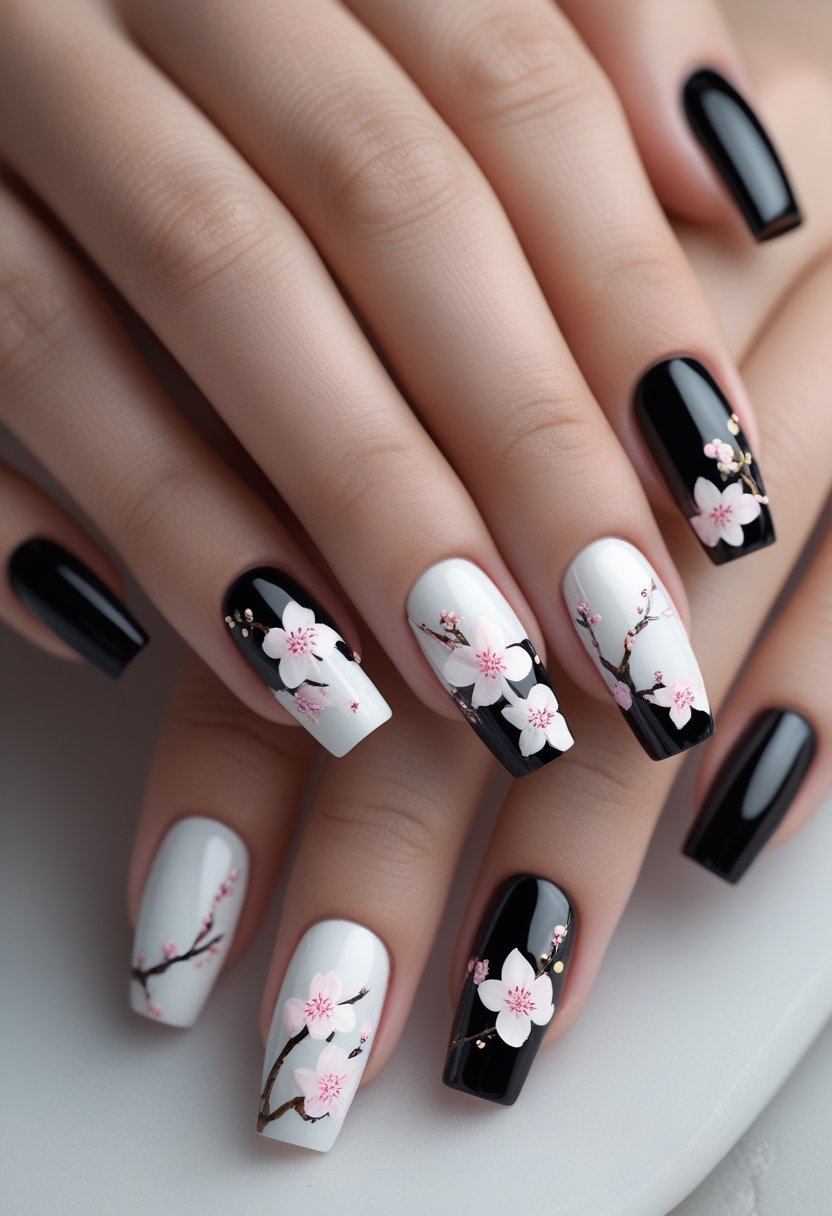
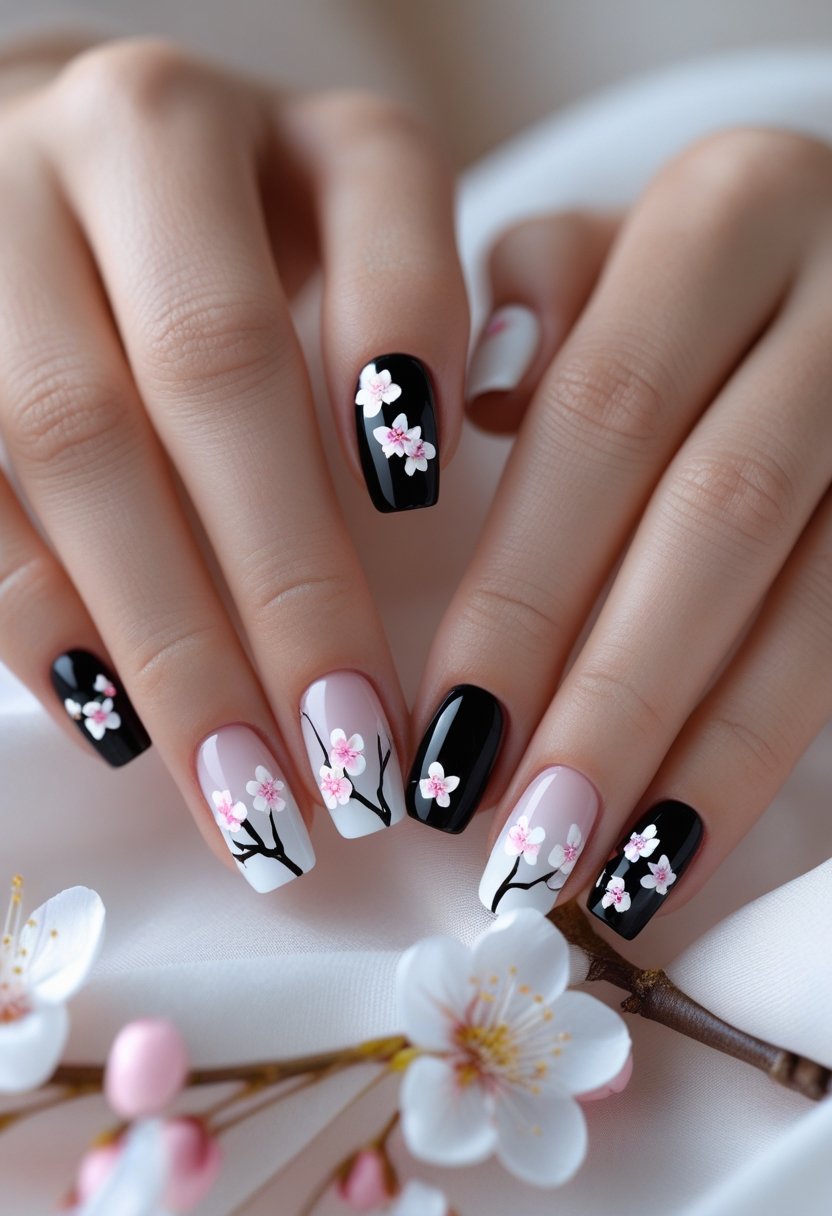
This nail art trend combines black and white ombre nails with delicate hand-painted cherry blossom designs, creating a striking yet refined look. The pink floral accents bring a subtle feminine touch, balancing the boldness of the dark ombre with soft, romantic details.
The glossy finish and minimalist cherry blossom art make this manicure ideal for spring or stylish everyday wear, offering a modern take on floral nail designs that appeals to a wide audience. It’s a versatile choice, blending contemporary style with classic elegance, perfect for anyone seeking unique and Instagram-worthy nail inspiration.
Overview of the Black and White Ombre Cherry Blossom Nail Art Trend
This nail art trend features a striking gradient effect from black to white, enhanced by delicate hand-painted cherry blossom motifs. It combines contrasting colors with soft floral details to create a versatile, stylish look suitable for various occasions.
The design balances boldness and elegance through specific artistic techniques and meaningful seasonal symbolism.
Defining Key Elements and Styles
The core of this trend is the black and white ombre base, where colors fade seamlessly from deep black at the cuticle to pure white at the tips, or vice versa. This ombre effect adds depth and modernity to the nails.
Hand-painted cherry blossoms, typically in soft pink or white, are delicately applied on top. These floral details are precise, highlighting the fine petals and branches with artistic skill.
The nail shapes often emphasize clean lines, such as almond or square shapes, enhancing the overall sophistication. The combination of dramatic monochrome gradients and subtle floral art sets this trend apart from more conventional manicures.
Why Cherry Blossoms are a Seasonal Favorite
Cherry blossoms symbolize renewal and the fleeting nature of beauty, making them a meaningful motif during spring and beyond. Their cultural association with springtime ties the design to fresh starts and seasonal change.
The blossoms’ soft pink shades contrast naturally with the black and white ombre, bringing life and warmth to the monochromatic palette.
This motif is popular because it merges cultural symbolism with visual appeal, allowing wearers to express both aesthetic taste and appreciation for nature’s delicate cycles.
Minimalist Floral Accents and Glossy Finishes
The trend favors minimalist placement of cherry blossoms, usually limited to one or two accent nails or sparse floral clusters, maintaining an uncluttered feel.
Glossy finishes highlight the smooth transition of ombre colors and enhance the vibrancy of the pink blossoms. This shine also adds dimension, making the details more noticeable under light.
The combination of minimalist art and a shiny top coat supports a chic, modern look that is both feminine and versatile enough for everyday wear or special occasions.
Design Techniques for Hand-Painted Cherry Blossoms
Creating black and white ombre nails with delicate cherry blossom details requires precise layering, color blending, and steady brushwork. The process involves careful application of gradient backgrounds, adding soft pink petals, and maintaining clean lines for a refined look that complements the floral design.
Step-By-Step Ombre Nail Creation
To achieve the smooth black and white ombre base, nail artists start with a white or light neutral polish as the base. After it dries, a makeup sponge or specialized nail sponge is used to dab layers of black polish toward the tips, gently blending the middle area to create the gradient effect.
Multiple thin layers are preferable to one thick coat, allowing for a seamless fade and better control over the intensity of the black pigment. Each layer must fully dry before applying the next to avoid smudging or uneven texture.
Finishing the ombre with a clear glossy topcoat seals the gradient and provides a smooth surface for the hand-painted cherry blossoms.
Adding Pink Floral Accents for Feminine Appeal
The cherry blossom petals are painted using soft pink nail polish or gel paint with a thin detail brush. The petals typically consist of five subtle strokes forming each flower, with slight transparency to maintain delicate softness.
Using varying shades of pink—light and medium tones—helps add depth and realism. Dotting small white or darker pink centers enhances the blossom details.
Positioning the flowers mostly near the tips or edges of the nail keeps the design balanced and complements the ombre background without overpowering it.
Tips for Clean Lines and Delicate Blossoms
Steady hands are essential; nail artists often rest their painting hand on a flat surface for stability. Using a fine detail brush with a sharp tip helps achieve precise strokes for petals and stems.
To avoid thick paint buildup, thin the polish with a nail art medium or use gel paints, which allow easier control and correction before curing. Wiping the brush frequently prevents unwanted blobs or smudges.
Practicing simple petal shapes and mastering consistent pressure ensures each cherry blossom looks soft and refined. Using a topcoat after the paint fully dries protects the design and enhances the overall glossiness.
Enhancing Your Style with 3D and Glossy Effects

Adding dimension and shine elevates nail art beyond simple polish. Techniques like 3D embellishments and glossy finishes make manicures visually striking and durable. These effects work well with delicate designs such as cherry blossom accents, creating a balance between texture and sleekness.
Incorporating 3D Elements into Nail Art
3D elements include rhinestones, gems, and raised acrylic designs that add tangible texture to nails. For cherry blossom nails, hand-painted flowers can be accented with small rhinestones or tiny acrylic petals to create depth.
Placement is crucial. Applying 3D details strategically on a few nails prevents the design from becoming overwhelming. Using lightweight 3D accessories also helps maintain comfort and prevents snagging.
Photos often show 3D nails with tapered or coffin shapes, which provide a larger canvas for embellishments. Incorporating subtle 3D details enhances the overall artistry without distracting from the soft floral theme.
Achieving a Long-Lasting Glossy Finish
A durable glossy finish protects the nail art and highlights color vibrancy. High-quality gel or chrome topcoats offer extended wear and resistance to chipping.
For best results, nails should be prepped by buffing and cleansing before applying base and color layers. Curing under LED or UV light ensures the glossy finish hardens evenly.
Reapplying a clear topcoat every few days restores shine and adds an extra protective layer. Glossy finishes also enhance 3D decorations by creating contrast between smooth, reflective surfaces and textured accents.
Seasonal and Everyday Inspiration for Cherry Blossom Nails
This trend balances delicate cherry blossom motifs with versatile nail art styles. It suits seasonal events as well as everyday looks, combining subtle elegance with modern design elements for broad appeal.
Perfect Looks for Spring and Floral Themes
Cherry blossom nails evoke the arrival of spring through soft pastel backgrounds and delicate pink floral accents. This style pairs well with traditional springtime colors like baby pink, lavender, and mint green.
Designs often include hand-painted blossoms on gradient or ombre bases, mimicking natural cherry petal transitions. It’s popular for cherry blossom viewing events or any occasion celebrating floral themes.
The look remains seasonal but can also highlight feminine elegance, making it a favored choice during spring festivals or photo sessions centered on nature and renewal.
Chic Designs for Stylish Daily Wear
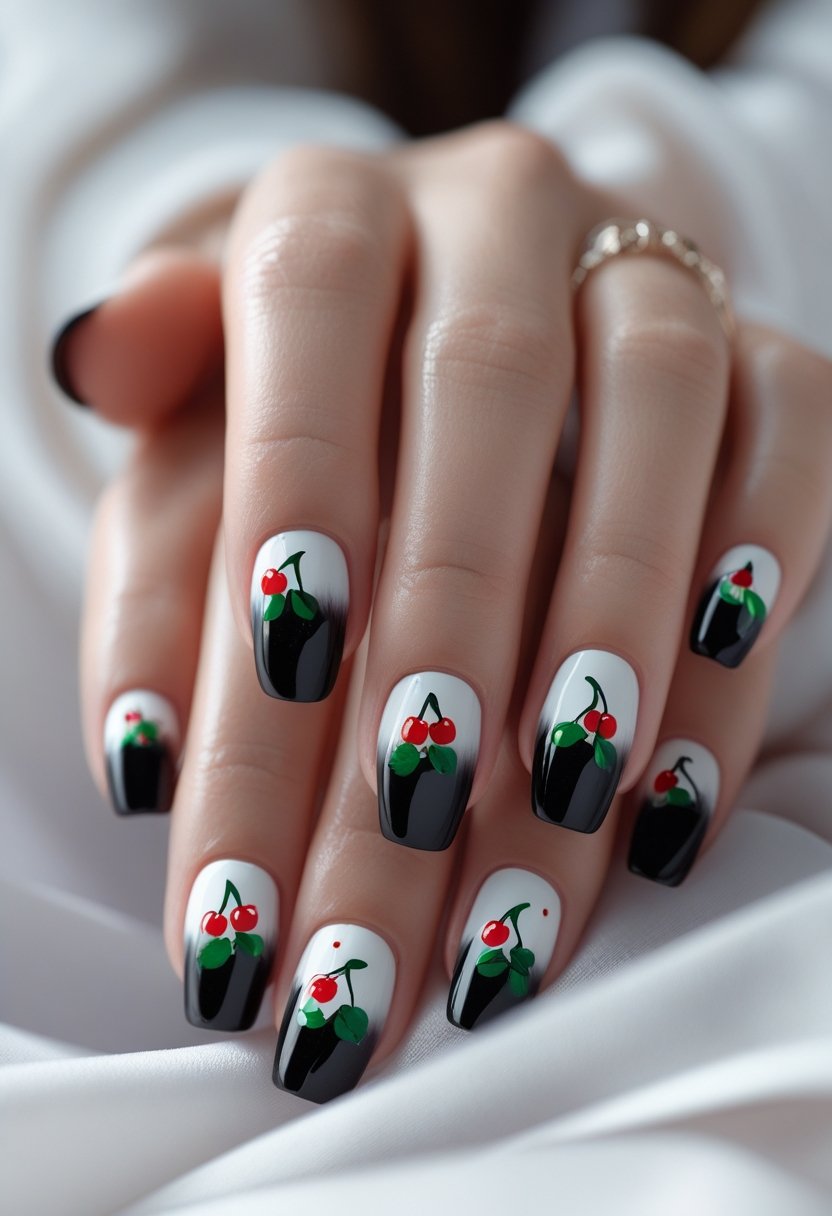
For everyday wear, cherry blossom nail art adopts minimalist and neutral base colors such as white, beige, or soft gray. This choice allows the floral designs to stand out without overwhelming the look.
Black and white ombre nails with subtle pink blossoms create a polished yet understated effect. The glossy finish adds sophistication suitable for professional settings or casual outings.
This style maintains a balance between delicate artistry and modern simplicity, appealing to those who want feminine details that don’t compete with busy daily schedules or fashion agendas.
Instagram-Worthy Nail Art Ideas
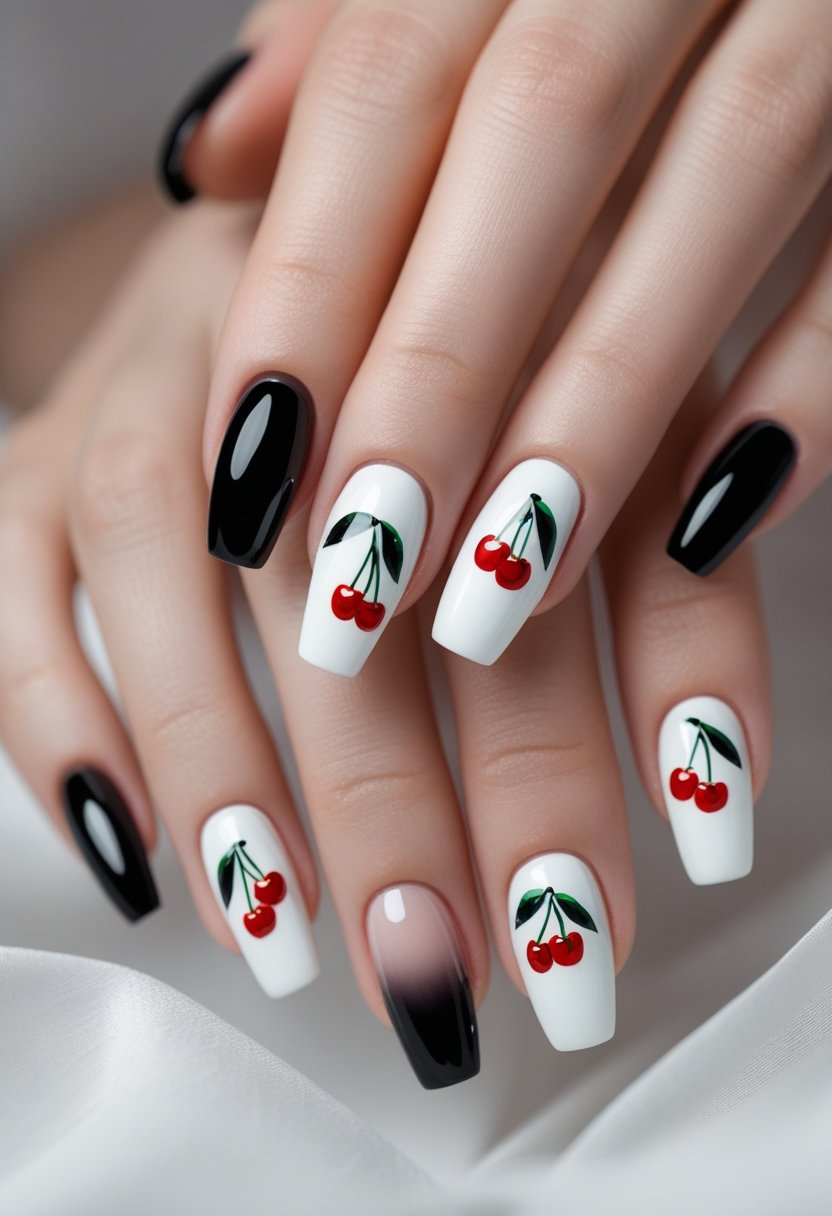
Bold, detailed cherry blossom designs offer strong visual appeal for social media content. Combining gradient or ombre bases with precise hand-painted flowers contributes to highly sharable photos.
Popular enhancements include subtle glitter, 3D floral decals, or metallic accents to elevate the original design without detracting from the blossoms. Stylists often use close-up shots focusing on texture and color contrast.
These manicures serve as a creative showcase, demonstrating technique and current nail art trends, and attracting followers interested in fresh, seasonal nail inspiration.
Expert Tips and Aftercare for Striking Results
Achieving and maintaining flawless black and white ombre nails with delicate hand-painted cherry blossom designs requires attention to detail, the right products, and skilled application. Proper care supports longevity, while choosing tools and techniques enhances precision and durability.
Maintaining 3D and Hand-Painted Designs
3D and hand-painted nail art are vulnerable to chips and wear due to their raised and detailed nature. To protect these designs, using a gel or sturdy topcoat is essential. A thin layer of topcoat every two to three days will seal the artwork and reduce peeling.
Avoid excessive exposure to harsh chemicals or prolonged soaking in water, as these can weaken the design and the underlying nail. Light tasks such as typing or applying pressure should be done with care to prevent accidental damage. When performing tasks like dishwashing, using gloves will extend the life of the manicure.
Proper nail hydration also preserves 3D elements, preventing them from becoming brittle. Applying cuticle oil daily supports nail flexibility without compromising the design’s integrity.
Choosing the Best Products and Tools
Precision is key when creating sharp ombre gradients and fine cherry blossom accents. High-quality brushes with thin, flexible tips allow for detailed painting while minimizing smudging. For blending ombre effects smoothly, sponge applicators with gentle dabbing motions are preferred.
Professional-grade gel polishes offer a longer-lasting finish and vibrant color retention compared to regular polish. When selecting polishes, opting for those labeled “long-wear” or “chip-resistant” enhances manicure durability.
Topcoats with a glossy or semi-matte finish complement this style well. Matte finishes can soften the look, while gloss adds shine and visual depth. UV or LED lamps are required to cure gel polishes properly, so having these tools improves the final outcome.
Working with Professional Nail Artists
Choosing an experienced nail artist skilled in ombre techniques and hand-painted designs can dramatically impact the final look. Professionals understand layering, curing times, and brush control critical for intricate cherry blossom art.
It is important to communicate desired color gradients, floral styles, and finish preferences clearly. Sharing reference images or photos helps the artist target the exact aesthetic.
Regular appointments with the same nail artist can ensure consistent quality and timing for touch-ups or removal. Professionals also advise on customized aftercare tailored to specific nail types and design styles, optimizing both appearance and nail health.
Capturing and Sharing Your Nail Art
Properly showcasing nail art requires attention to lighting, angles, and digital presentation. Selecting the right platforms and hashtags increases visibility among nail art enthusiasts and potential followers.
How to Photograph Your Nails for Social Media
Natural lighting is essential for clear, true-to-color photos. Position nails near a window or use soft daylight to avoid harsh shadows.
A plain, uncluttered background helps the black and white ombre with cherry blossom details stand out. Neutral tones or subtle textures work well.
Focus closely to capture the delicate pink floral accents without blurring. Use the camera’s macro mode or a lens attachment if available.
Experiment with angles: top-down or a slight side angle highlights the glossy finish. Avoid flash photography as it can create unwanted reflections.
Post-processing should be minimal to retain accuracy. Adjust brightness and contrast slightly, but avoid heavy filters that distort the nail art’s colors and detail.
Popular Hashtags and Platforms for Nail Inspiration
Instagram remains the leading platform for nail art sharing, thanks to its visual layout and active community.
Using specific hashtags increases discoverability. Examples include:
- #CherryBlossomNails
- #OmbreNails
- #SpringNailArt
- #HandPaintedNails
- #NailArtInspo
Pinterest also drives engagement for nail tutorials and ideas due to its search-friendly format.
TikTok is growing in popularity for short nail art videos, especially step-by-step painting and time-lapse content.
Tagging relevant nail artists or brands can amplify reach. Engaging with comments encourages interaction and builds a following interested in detailed designs like cherry blossoms on ombre backgrounds.